By Tim Blackwell
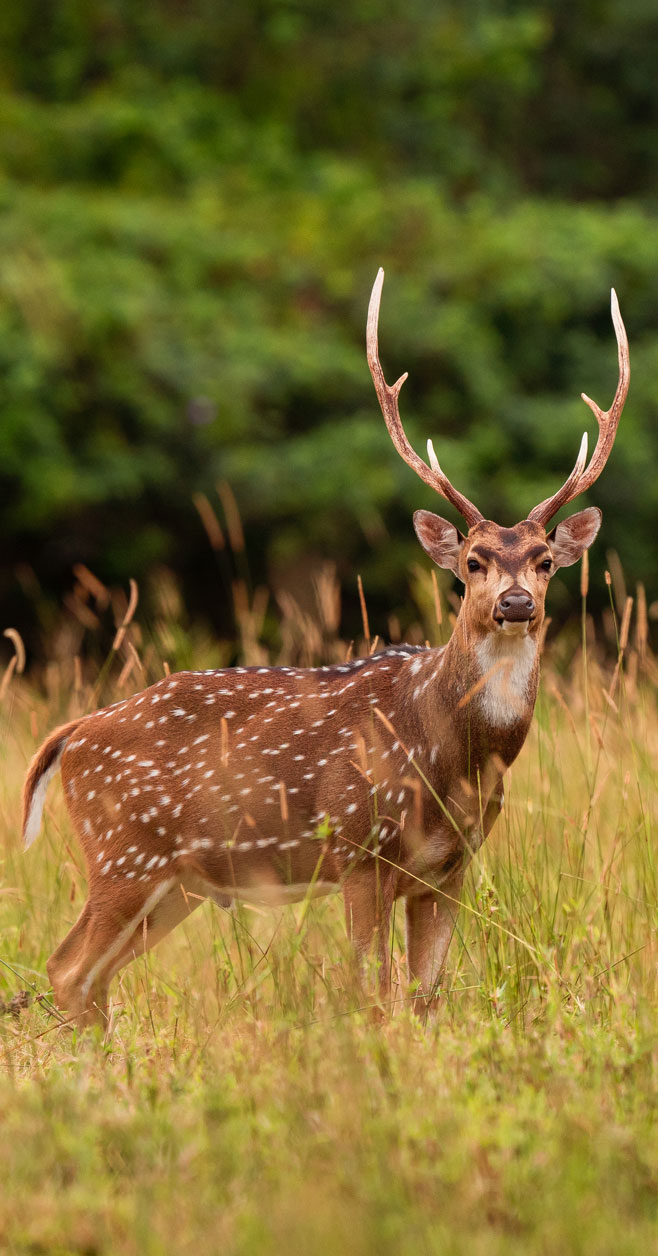
Taxidermy has long been viewed as one of the ‘black arts’ by many. There was generally no way to learn but to be self-taught, and nobody wanted to share their hard-won secrets with a ‘newbie’. Today, this has changed to some degree, but educational opportunities are still very limited in Australia at least. To this end, most customers can be excused for having very little idea of what goes on inside the walls of the taxidermist’s workshop. They drop their prized trophy off, and hope to see it again looking better-than-new in somewhere around six to 12 months time!
So, what are the general processes involved, and what does the taxidermist go through to make your trophy mount a work of art to be immortalised on the hunter’s wall? Why does it cost what it does, and why does it take so long? As a taxidermist myself, I hope I can clear up a few of these commonly asked questions.
First and foremost, it must be said that there is absolutely nothing that equals good quality raw materials. The way you treat your trophy after it is shot will have a very large bearing on the quality of the end result. By skinning as soon as practicable, taking the cape off cleanly with a minimum of meat and fat, splitting any thick areas like the lips and nose cartilage, inverting the ears fully and without damage, trimming meat off the ear-butt cartilage, and finally salting thoroughly, you maximise your chances of a great looking mount. The sooner you can do all this the better, and practice makes perfect – even a female or meat animal provides a good subject, and these days there is plenty of tutorial information on the net or via DVD.
After delivery, most taxidermists will re-salt your cape and thoroughly dry it; depending on location they often have a dehumidifier for this process. A salt-dried cape will last many months and is much easier to store than in a freezer. Skulls are cleaned further where necessary, and both antlers and capes are marked or tagged to match up with the taxidermist’s customer records. So, with a dry salted cape, and a cleanly boiled skullcap, the job can commence; once it reaches the top of the waiting list that is!
The first process the taxidermist will go through is to rehydrate and pickle the cape. Tanning for taxidermy is not like making a rug, the skin is mounted while still wet, and must have good stretch. It then dries rock-hard, not soft and pliable like a rug needs to be. This pickling can take several days or more, during which pH must be constantly monitored. Towards the end of the pickling process the skin is then shaved down using a special fleshing machine, often referred to as a ‘round knife’. This thinning process gives the skin more stretch and makes it much easier to work with, highlighting details in critical areas like the face, and reducing shrinking and cracking as the mount dries.
Following pickling and shaving, the skin then goes through a pH neutralising process before being put into a tanning solution. This can be a mixture of several chemicals, but alum or Lutan F are probably the most popular tanning solutions used. After the required time, governed by the weight of the cape, the skin is then oiled and set aside for the oil to penetrate and soften the hide. Finally, with the tanning process complete, the cape is tumbled in sawdust to soften it further and ‘break it’ somewhat. At this point the cape is ready for mounting or be stored in a freezer. Already, at least a month (and more often three to six) has gone by before the skin is ready. Some taxidermists carry out this complete tanning process themselves, but many others, due to time and space constraints, outsource this process to a professional tanner.

With the cape now tanned, the first step is to measure it thoroughly and select a ‘form’ (also known as manikin). Again, some taxidermists have their own moulds and pour their own foam forms, where others outsource and buy commercially available forms. Either way, they must take into account the customer’s wishes for the style of mount (that is alert, sneak, left turn, right turn, pedestal, wall pedestal or full custom) and marry this up with the measurements from the cape to select the most suitable form. Even then, modifications are par for the course – a form is only a starting point. Even when a wide range of forms for a particular species are available, there is seldom ever one that is a ‘perfect fit’. The taxidermist might have to build up, shave down, change angles, and sometimes even perform drastic cut and fill jobs to sculpt a form that suits the individual animal and customer. In some cases, a custom form needs to be created out of other forms, or even carved fully from a block of foam. All of this takes time of course and contributes to the cost of a mount, but the end result is worth the effort.

When the form is ready, the antlers or horns need to be set in the right position; this is where reference photos and measurements are invaluable. A hanger is also installed to the backboard to support the mount on the wall; there are various types depending on preference. Further preparatory sculpting is done to the face, around eyes, pre-orbital glands, skullcap, and lip line. The correct size and colour of glass eye must be selected and set at the correct angle and depth – this is absolutely critical as nothing will ruin the look of a mount more than incorrect eye set.
With the costs of tanning, form, eyes, and other consumables, around half of the cost of your end result is already taken up in materials. And this is before the cost of running a business and premises are taken into account, and of course long before a wage for the artist is considered!

With the form prepared for mounting, now we must turn our attention to the final preparation of the cape. Any holes (from skinning, bullet/arrow damage, or from the tanning and shaving process) must be carefully sewn. Sometimes these areas require patching. Any areas to be tucked (including the inner nostril skin, lips, and inner eyelids) need to be extremely well thinned and trimmed to length. The ears then need to be set, using the method of the artist’s choice. Some taxidermists like to use a pre-formed ear liner, while some prefer a fibreglass type filler; and many use both methods interchangeably depending on the species and the condition of the individual ear. Once the cape is fully prepped and ears are set, the cape can then go through a test-fitting, which is sometimes the first of several required to ensure everything is perfect. A lot of clay sculpting work is done to the form during this phase, to ensure correct fit for the specimen, and to help style the overall look and ‘attitude’ that the taxidermist is trying to recreate.

Now we are finally at the moment of truth – the mounting. The form is coated in hide adhesive and the cape temporarily pinned in place so that sewing can commence. This is a job that often takes several hours. At this stage the face is also set – everything tucked into place, ear-butts rebuilt with clay and positioned, eyes set and coronets adjusted. During and after sewing, the hide can be moved (‘taxied’) into position, taking care that hide patterns and anatomical markers on the animal align as they should. The skin at the rear of the mount is trimmed and stapled into place on the backboard.
Depending on the individual animal and style of mount, some degree of pinning is normally required to hold detail in place while the adhesive dries. Over the next crucial few days, there are regular adjustments being made to the mount as it begins to harden and dry, and the skin shrinks slightly. A pin here and a poke there, to get it all looking perfect. At this stage the mount is put aside to fully dry before it can be finished. Again, the process cannot be rushed and this can take up to a month alone, depending on the climate and the size of the specimen.
When thoroughly dry, the mount can now undergo the finishing process. Any gaps are filled with a special epoxy and sculpted smooth. This can include nostrils, eyes and other features. Often the nodules on the nose pad are re-built to give a fleshy look, along with other small tips and tricks of the individual artist. These are things that the customer may never notice, but are often what sets a top-notch mount apart from an average one. The mount can now be painted, and an airbrush is generally used for the fine detail they are capable of. It can take anywhere from three up to ten or more colours to bring a deer back to life, around the eyes, nose pad, nostrils, ears and sometimes other areas, building colours up gradually and blending them for a life-like appearance. This is then finished with a clear coat which can be matte or gloss depending on the situation.
The finished mount is then groomed, which generally involves brushing, or blowing with a hair dryer or compressor. Then it’s time to call the customer and give them the news they’ve been waiting for, that their special trophy is finally ready to go home!
I hope this may have given hunters a little more idea about what is going on with your trophy behind the scenes. A good taxidermist is part artist, sculptor, carpenter, butcher, upholsterer, and many other skills all rolled into one; and it takes years to finely hone their craft. One thing is consistent however, they all have a love of animals and interest in their anatomy. I think you may appreciate the work that goes into it, and perhaps understand now why waiting times can be long, especially when a taxidermist might have 50 or 100 other mounts to get through before yours! It is also worth bearing in mind the time of year your trophy is dropped off. If it’s at a busy time like April-May, when the deer rut is coming to a close, you might have to be prepared to wait a little longer – as long as this is adequately communicated that is! But rest assured, the work of a quality taxidermist is worth waiting for, and when you have that trophy on your wall to admire for eternity, the time and money invested will quickly be forgotten as memories of the hunt come flooding back.

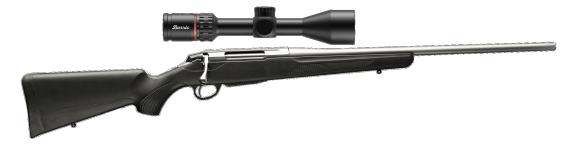
WIN TIKKA T3X LITE + BURRIS SCOPE
With firearms reforms actively underway across Australia, representation for deer hunters matters more than ever.
Join the Australian Deer Association during the campaign period and support experienced representation for deer hunting.
One new or returning member will be drawn to win a Tikka T3X Lite Stainless with a Burris scope.
Membership Benefits Include:
✓ Advocacy - Real Wins on the Ground
✓ Firearm & Public Liability Insurance
✓ Protect Public Land Hunting
✓ Education & Community
Proudly supporting the Australian Deer Association