Around 40 per cent of the usable meat from a deer comes from the two rear legs. To get the most out of your deer it is therefore essential that this meat is processed well and presented to the cook in an appealing form. This short article provides a guide to breaking up and presenting the rear leg meat.
The animal I have used for this demonstration was a 16-month-old fallow deer spiker. A red deer or sambar will have a much bigger leg but the basic anatomy of all species of deer are the same. All that changes are the size and the eating qualities.
I will assume that the leg has been looked after. With smaller deer, this means skinning the carcass from a supported position (so the surface is not cut about), hanging it for an appropriate period in a cool, airy place (I prefer at least seven days), and carefully removing the aitch bone (hip) without leaving much meat behind. If you are not careful in your knife work when detaching the leg from the aitch bone the rump will disappear without a trace. The rump is one of the best cuts, so be careful.
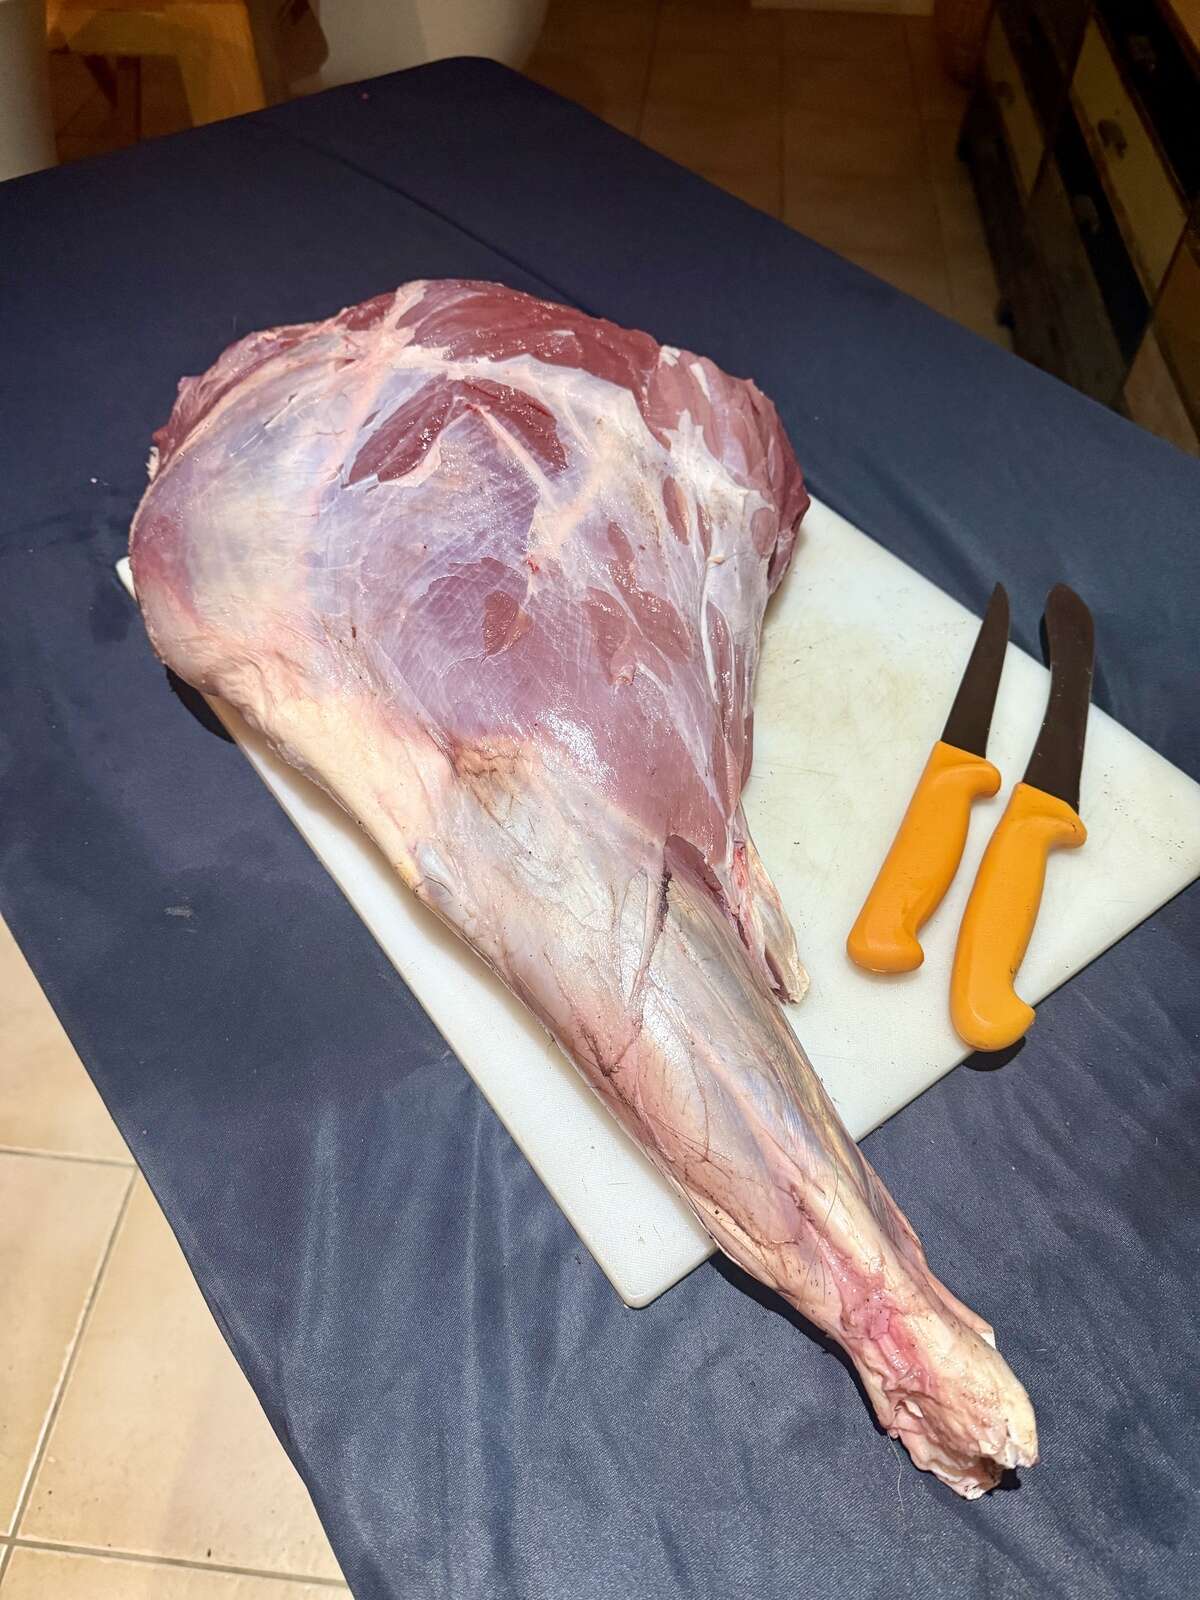
Do all this correctly and you will then have a clean, well-aged leg with a shank at one end and the ball of the femur exposed on the inside of the leg.
The equipment you will need is a short, sharp knife. I use a knife with a replaceable scalpel blade and a slightly sturdier knife for the tough work, but any short, sharp knife will do. The basic principle is to follow the seams and not to cut into the muscles.
You should work on a clean surface with a board under the leg so it does not slide around.
With the inside of the leg facing upwards open up the seam that runs from the exposed ball of the femur to the knee cap (it lies under the white cartilage in the centre of the front of the leg).
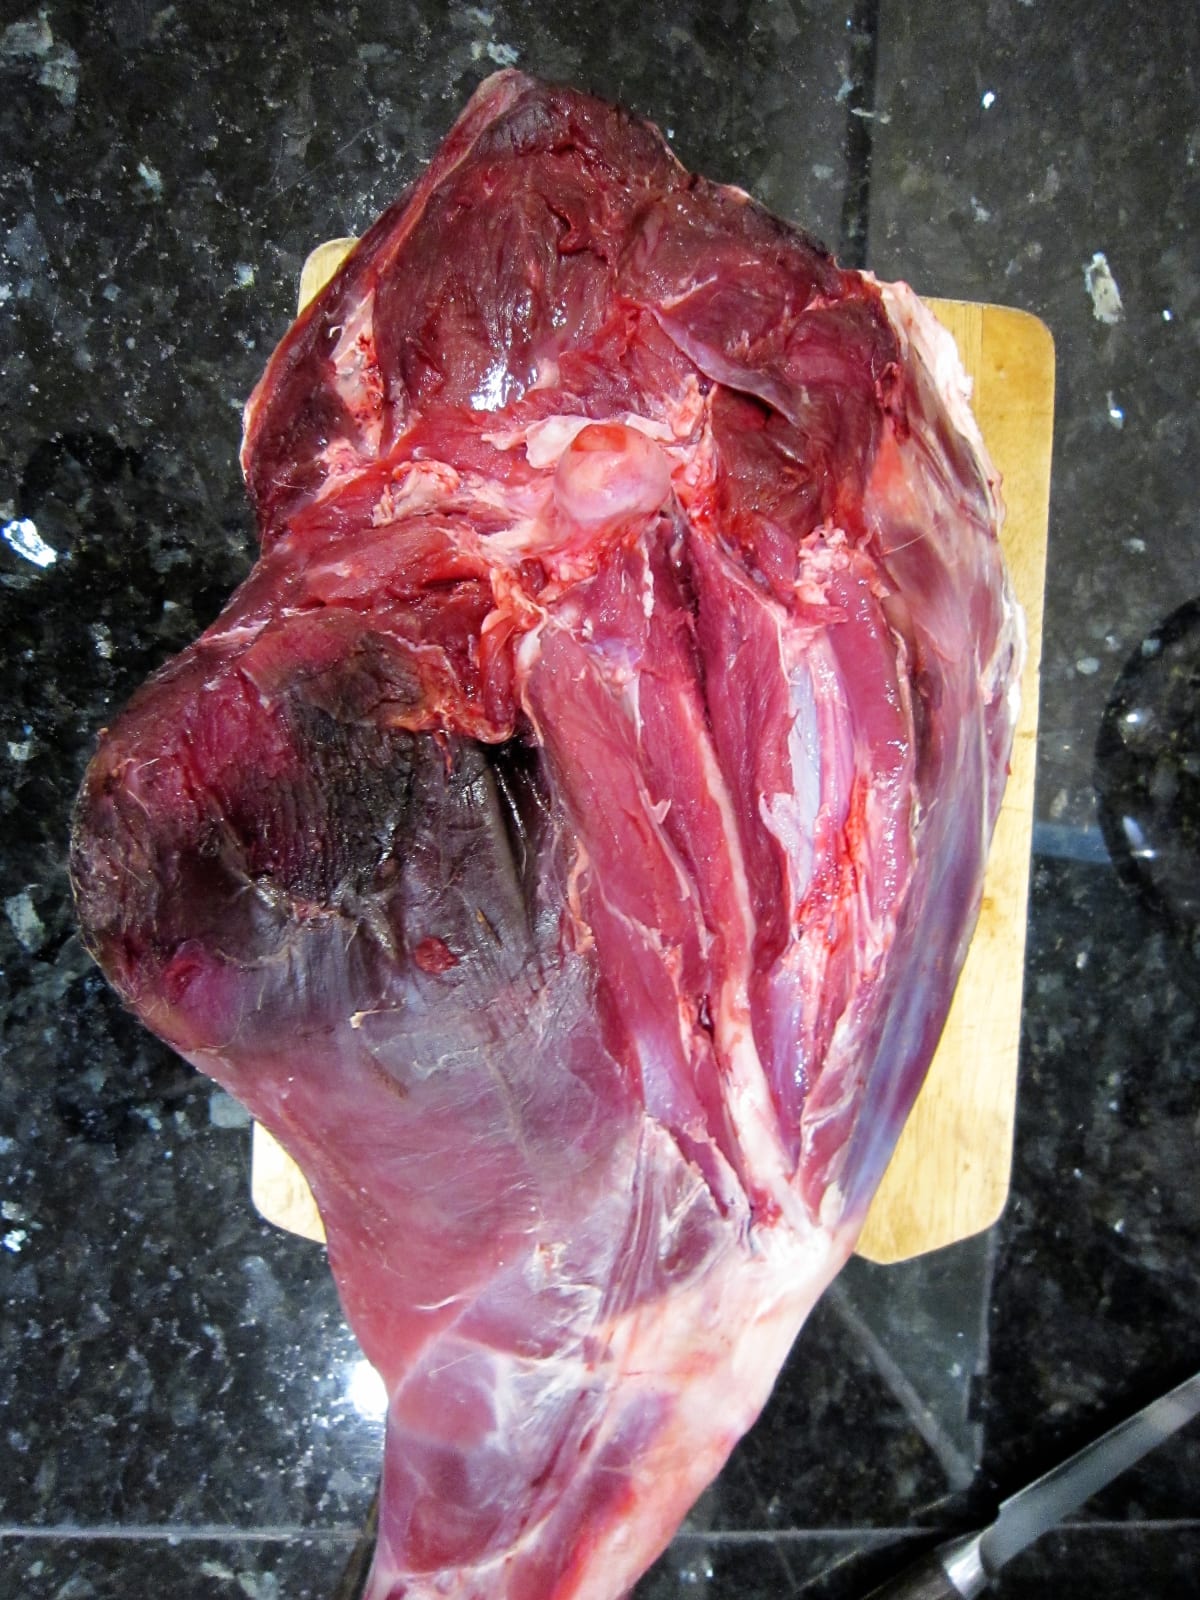
With the femur exposed work your knife around the length of bone and free up the exposed ball from the connective tissue. There is some cutting involved in this but keep your knife strokes small.
When the bone is free, cut around and remove the knee cap and rotate the knee joint cutting the connective tissue as you go. It will be necessary to twist the femur to dislocate it and expose the tissue that connects the bone inside the knee hinge.

When the femur is free lay out the leg and carefully cut the shank away from the upper leg with a straight cut of your larger knife. The cut should be at an angle to the leg of around 45 degrees to the shank. If your cut is at a right angle you will cut off the end of the salmon cut which is, after the fillet, the second best prime cut in a deer. It is a waste to leave this in the shank for slow cooking when it can eaten, seared quickly in a pan.
With the shank removed keep working at the muscle seams in the upper leg meat. You should be able to do most of the work with your fingers with just a few short knife strokes but if you have to use your knife keep close to the seams. The muscles will cleanly separate and all that remains is to cut through the thin surface membrane to separate them completely.
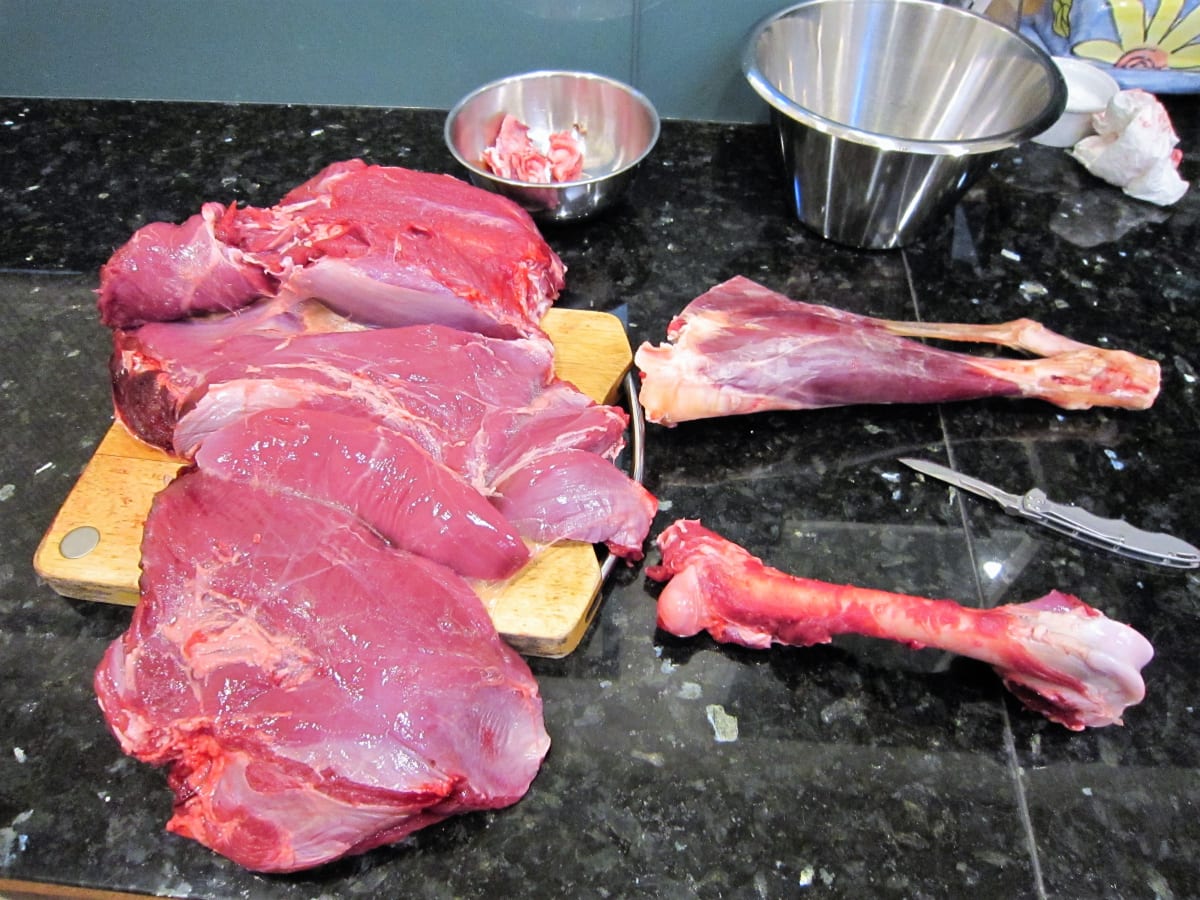
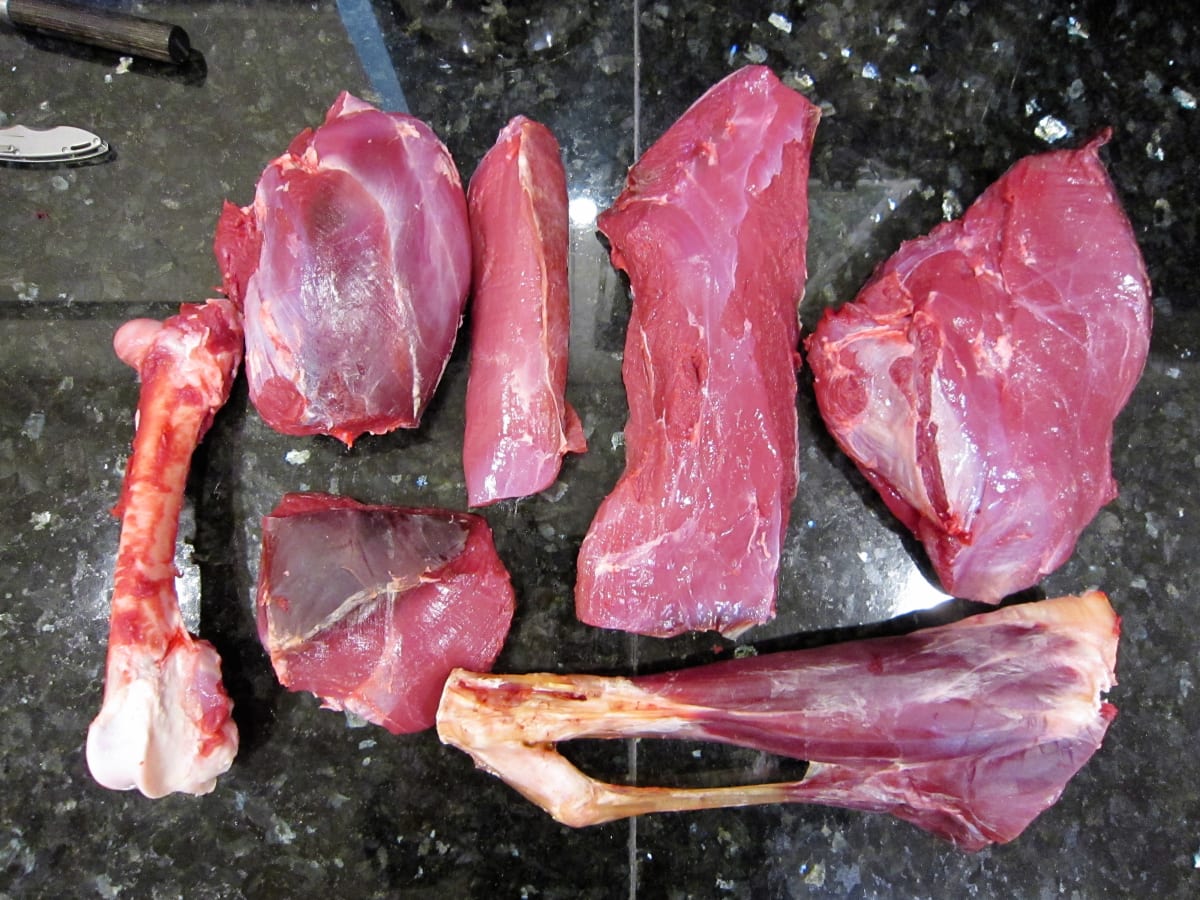
Remove any untidy edges and you will have the basic cuts laid out.
In the accompanying photo, I have carefully removed the sinew from the surface of the silverside and trimmed the pieces. Careful presentation at this point will provide a better result when the pieces are cooked. The shank will be easier to package if you saw it through close to the shin meat. I leave the bone attached because it adds flavour and texture to a stock or a slow cooked dish.
The next step is to date, label and package the cuts. If you have multiple deer of various ages it is a good idea to label them so the cook will have a guide to tenderness. I use a commercial vacuum packer which eliminates the risk of freezer burn. Venison can be frozen for at least six months so it is a good idea to keep a record of what you have in the freezer and cross the cuts you have used off the list as you use them. Vacuum packed meat also keeps well in the refrigerator and the aging process continues.

From a young animal such as this fallow deer spiker all these cuts can be put to high value use:
· The salmon cut lends itself to a quick sear in the pan with a little olive oil and rosemary.
· The topside can be cut into medallions and cooked as steaks.
· The topside and silverside are excellent as substitutes for beef in stir-fried Asian dishes.
· The rump can also be steaked or stir-fried.
· The thick flank makes an excellent roast.
· The shank can be slow cooked with lentils as you would a lamb shank. Alternatively, it makes an excellent stock base.
Contributed by Robert Butterworth.
Do you want to get the last Australian Deer news, events, updates & competitions directly to your inbox?
Enter your name & email below and we'll make sure you're the first to know!