
Robert Butterworth takes the time to walk readers through a favoured dish of his.
The rib rack is one of my wife’s favourite cuts so I take special care in the butchering to present a neat and attractive joint.
The quality of the finished product will depend on the animal you have harvested. The best racks come from young animals, up to and including spikers.
Before butchering it is important to let the carcase set and the surface of the meat dry out before cutting it. Ideally you will have hung the carcase for a few days at a low temperature. If this is not possible the carcase should be hung until it has set, broken into primary cuts, and then refrigerated for a few days before the complete breakup. Not many people have their own cool room, but a beer fridge can be pushed into service if you take one or more of the shelves out.
The primary cut is prepared by cutting between the fifth rib and sixth rib on either side of the animal and sawing across the spine. This releases the neck and the ribs forward. With good shot placement the entry and exit wounds will be well ahead of the fifth rib, although you may want to check for any intermuscular bruising.
If you have removed the shoulders by working from the inside and gently cutting and pulling, there will be a small crescent of surface muscle removed near the spine which covered the dorsal end of the shoulder blade. This extends a little beyond the sixth rib. If you were too vigorous you may have left a little shoulder cartilage behind and this should be removed.
A further cut across the spine is then made immediately behind the rib cage with a large knife and the butcher’s saw and you have the rear section of the rib cage as a single piece. If you do this with the carcase hanging you will need to take care to catch the primary cut as it comes away from the carcase.
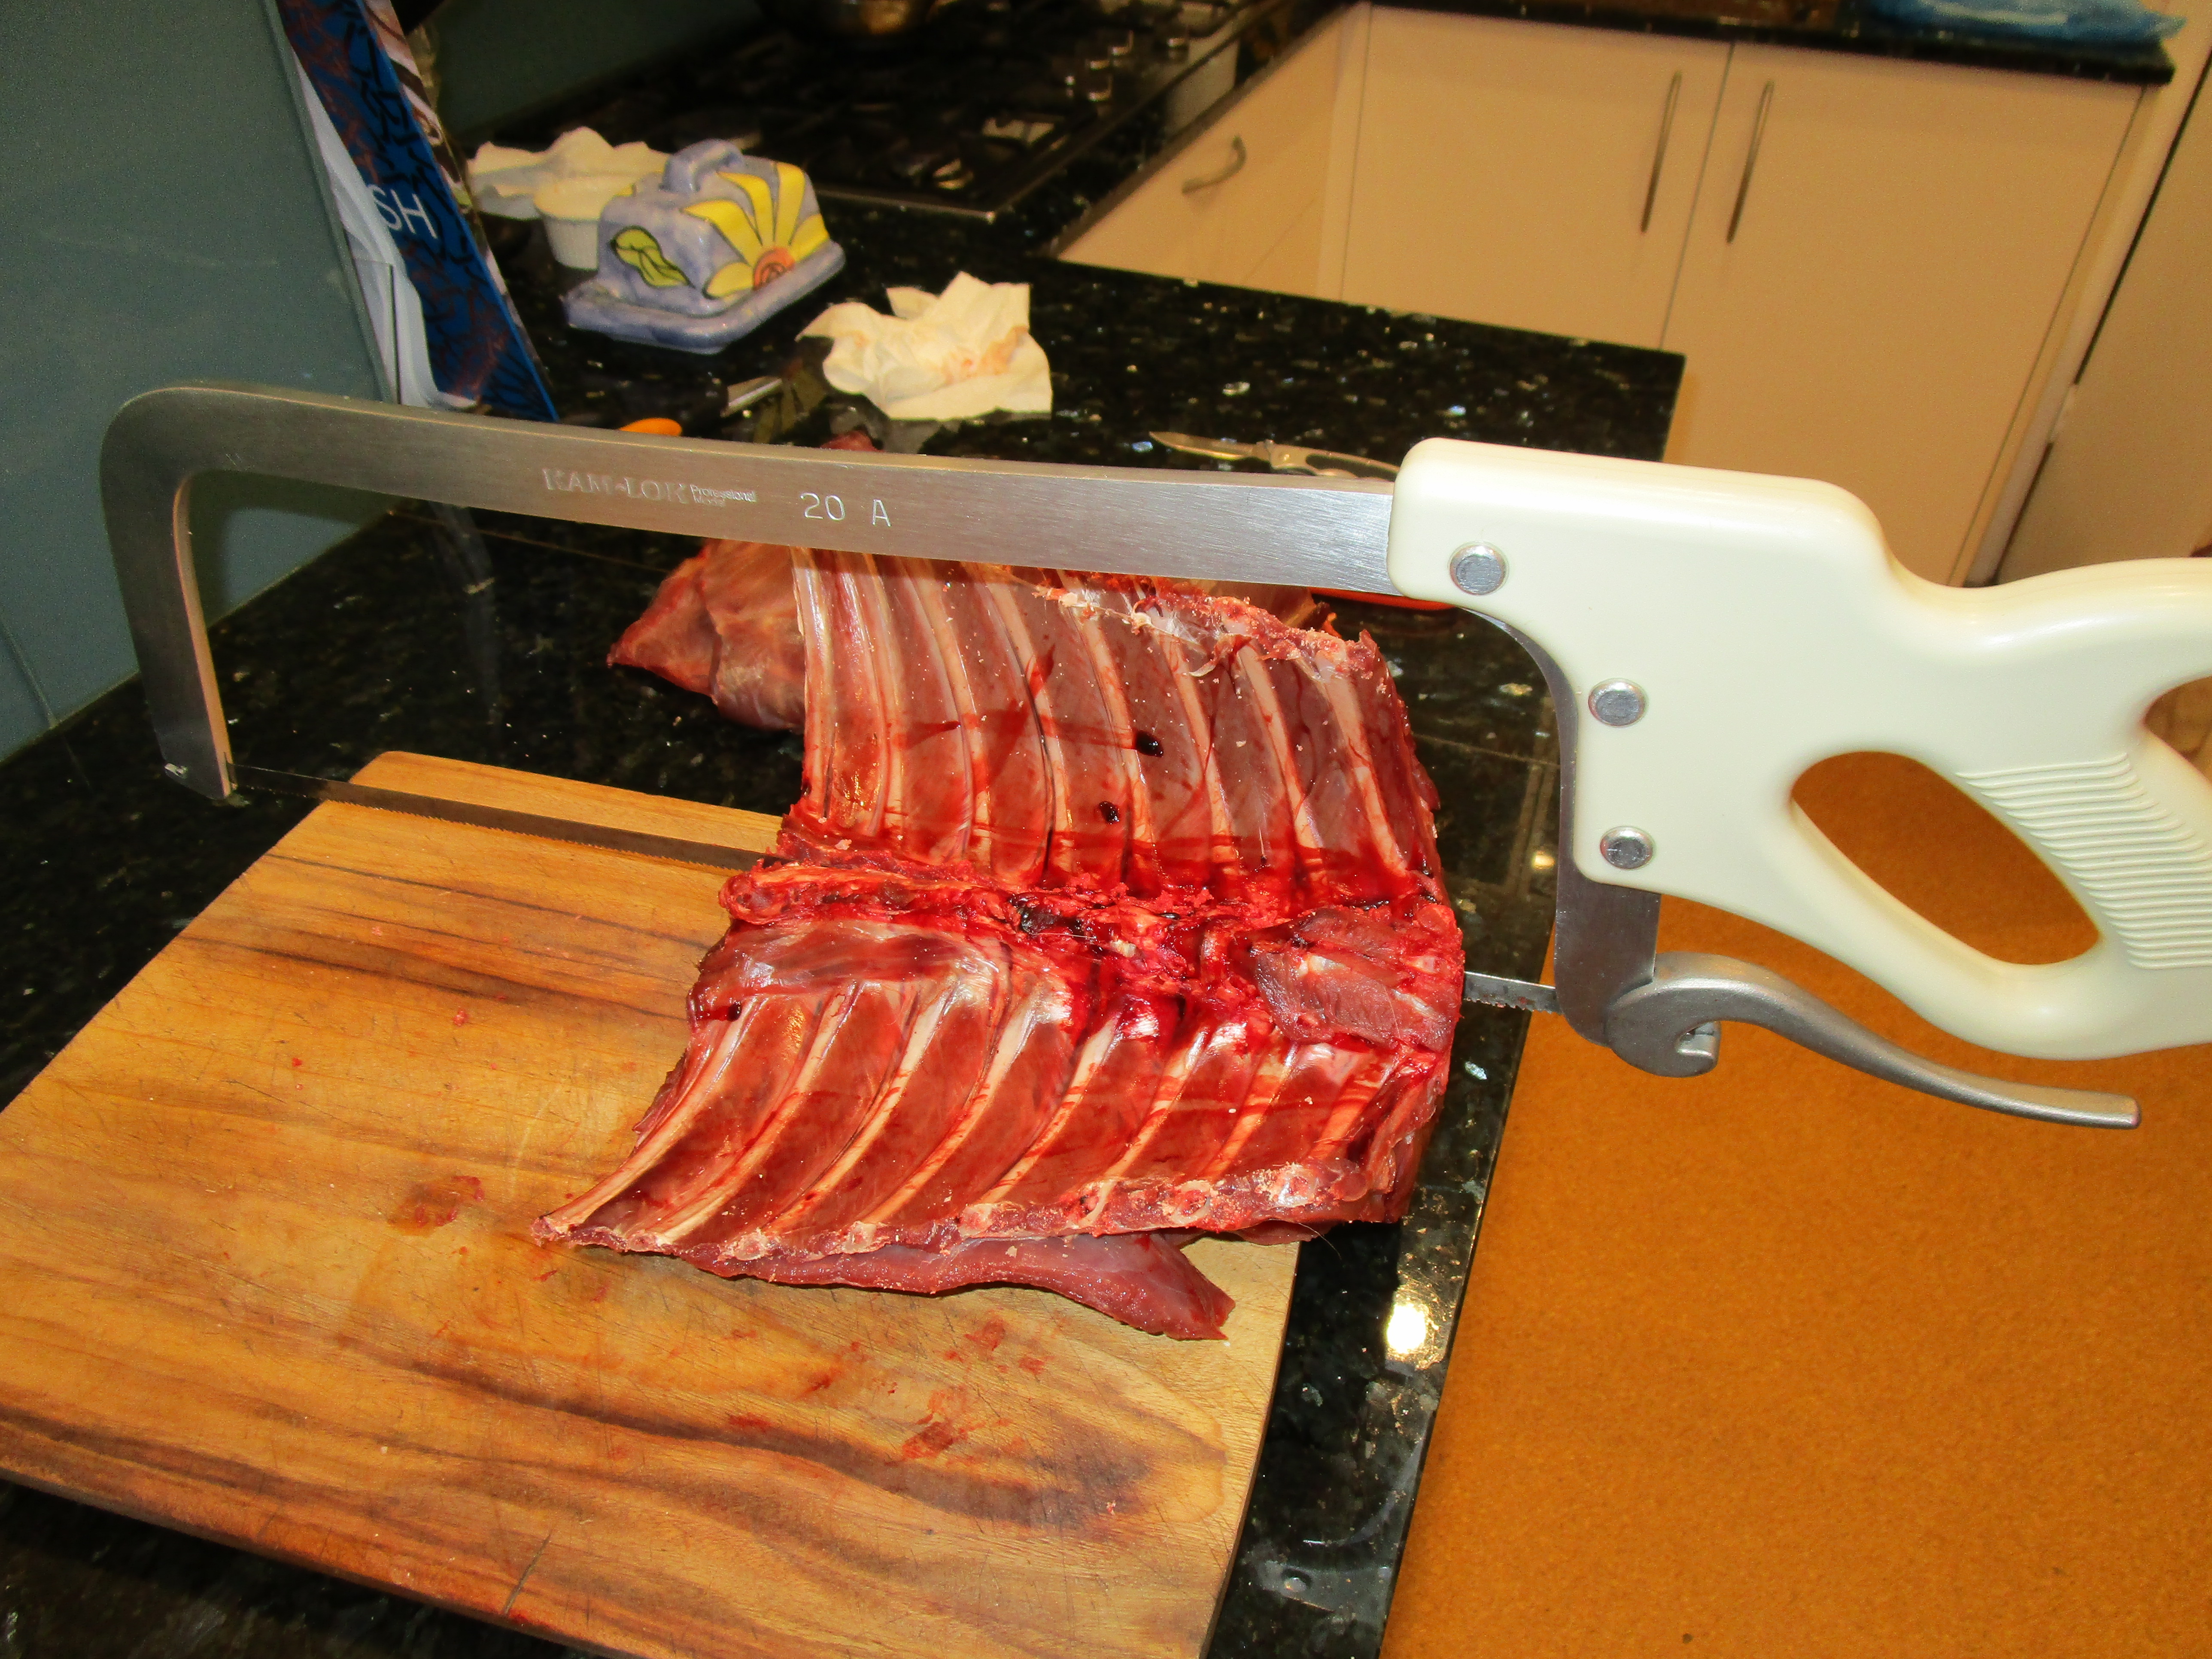
The ribs ends are then cut off parallel to the spine. This is best done on the bench. The distance from the spine is personal preference but I aim to retain about 10–15 cm of rib bone.
The ribs of course lengthen towards the rear, so some care is needed to get a neat cut parallel to the spine. The rib bones should be exposed with a knife cut first to allow the saw blade to contact the bone rather than mince the covering meat.
Once the double rack is freed the next task is to separate the two racks.
I turn the double rack over on its back and use the saw to cut adjacent to the spine. The idea is to cut the stub of the rib near the spine with a very thin sliver of spine to come away to keep the ribs connected in a rigid manner.
Some care is needed so you do not saw into the bench top or the cutting board. Do this and you will be very unpopular!
If you saw too close to the spine the chops will be hard to separate when you carve. If you go too wide the rack will be very flexible and you may leave meat on the spine. I manage to do both from time to time but with practice you get a little better at it.
Once the bone has been separated the backstrap meat should be carefully cut away from the spine until the upper surface of the spine is reached.
When you finish the paddywhack should stay attached to the spine — but if not, it too should be carefully removed. The dog will love it.
If you feel you have left a little too much bone on the rack you can snip between the rib bone stubs with the tips of the kitchen shears.
With the two racks separated from the spine they need to be cleaned up.
I like to cut the surface tissue away from the last two or three inches of the ribs and clean the meat from between the rib bones. How much effort you put into this depends on how fussy the cook is or how keen you are to please them.
There is a thin layer of meat and connective tissue covering the backstrap and I prefer to remove this for aesthetics and to make carving easier. There will be a thin layer of silver skin on the surface of the backstrap, but I leave this in place to hold the joint together. It is easily cut when carving and does not affect the presentation.
The finished product is pleasing to the eye. There should be eight ribs on each side to guide the carver. A fallow deer will have a rack of between 400 and 700 grams depending on the size of the animal. This should be more than enough to serve two people and provide some leftovers for a lunch.
THE RECIPE
The deer rack can be treated as you would a lamb rack. The bone slows the cooking and protects the tissue in contact with the bones. But the benefit is largely presentational and the opportunity to gnaw the connective tissue from the ribs after the meat is consumed.
A simple dry roasting is the best approach.
Suggested spice and seasoning options:
Contributed by Robert Butterworth.


Do you want to get the last Australian Deer news, events, updates & competitions directly to your inbox?
Enter your name & email below and we'll make sure you're the first to know!


